
This post is sponsored by The Home Depot.
By Jess Crow
Welcome to the start of my epic blog. There is no better way to start then with a little fire show.
In this post I am going to cover the process of creating a wonderful serving tray by using simple tools and colors from The Home Depot.

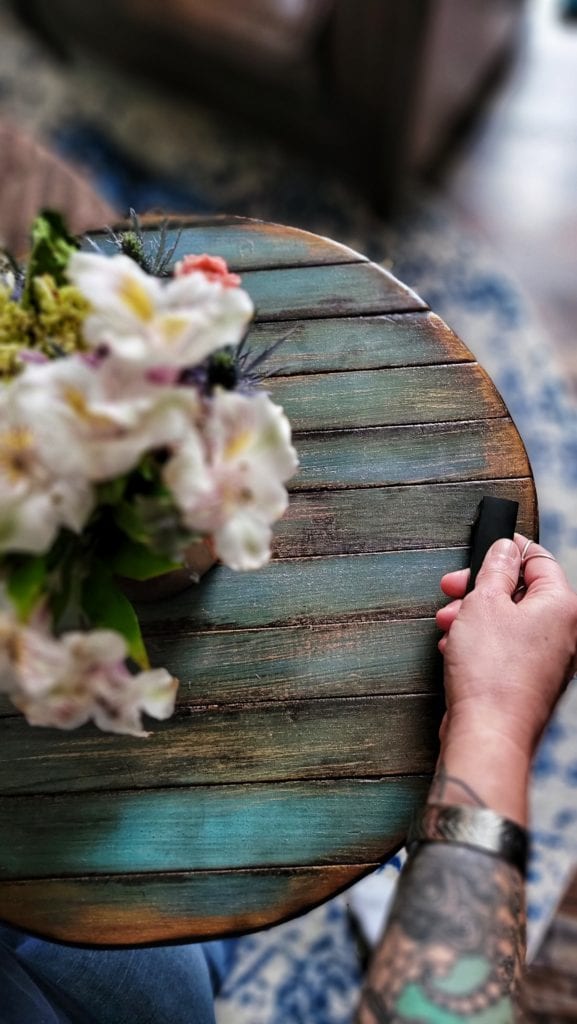
This Art Deco-inspired serving tray works up very quickly and with minimal tools. I’m going to show you every single step to use a Bernzomatic torch from The Home Depot to create this multicolored tray with hints of gold, copper, blues, and greens.
Did you know you can get elegant, bold, and crazy patina effects with a torch? No? Let’s go then!
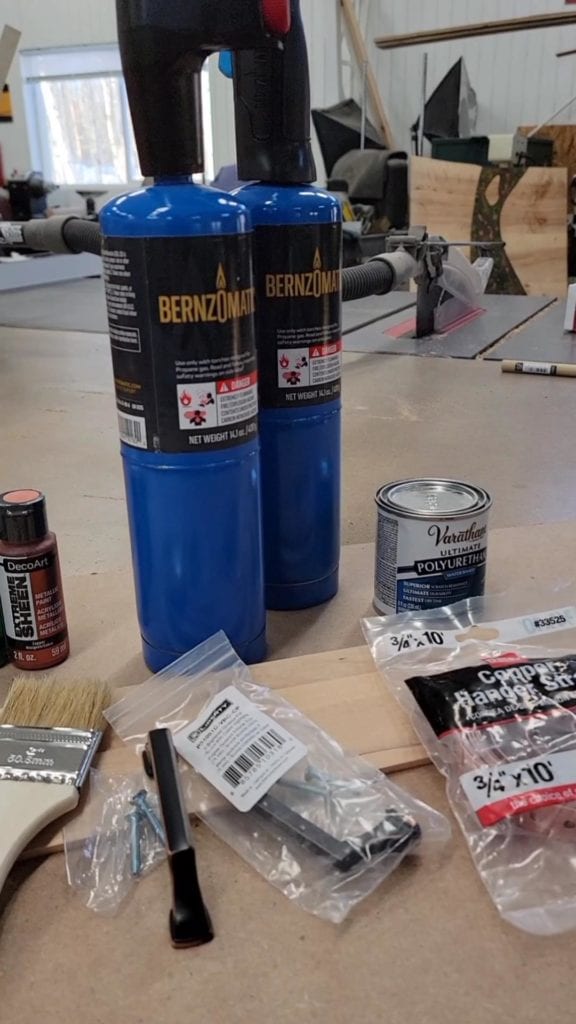
Supplies used
- Bernzomatic torch
- Acrylic paint (I used black, dark blue, turquoise, copper, and gold)
- Chip brush x2
- Trim strips from The Home Depot
- Gloss Varathane
- Titebond II Wood Glue
- Medium Density Fiberboard (Common: 1/4 in. x 2 ft. x 4 ft.; Actual: 0.216 in. x 23.75 in. x 47.75 in.)
- Cabinet handles
- Wood Veneer roll
- String
- Tack
- Marker or pencil
- Jigsaw
- Miter Saw (optional. You can use the jigsaw in its place)
- Drill or screwdriver to match cabinet hardware bolts
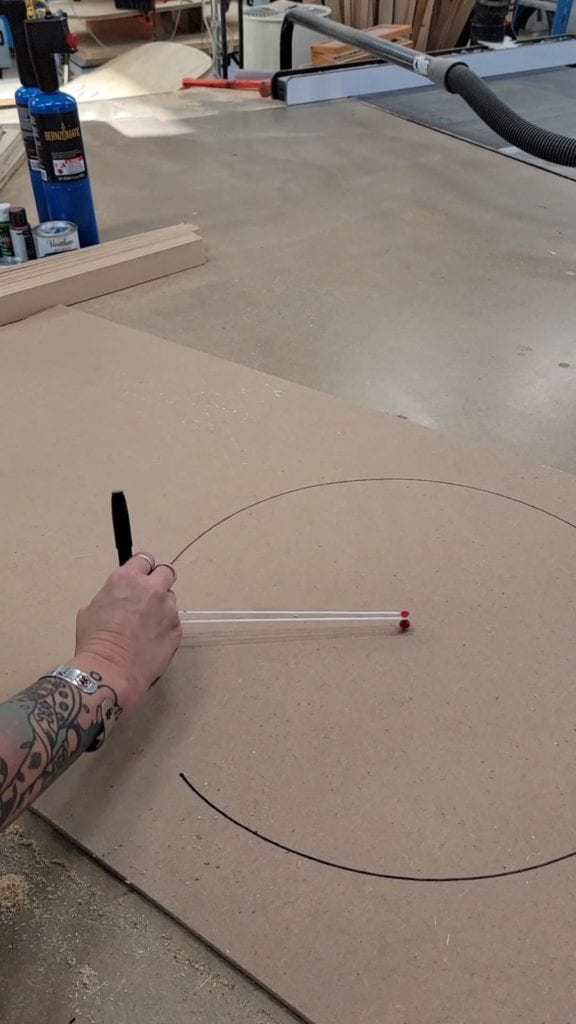
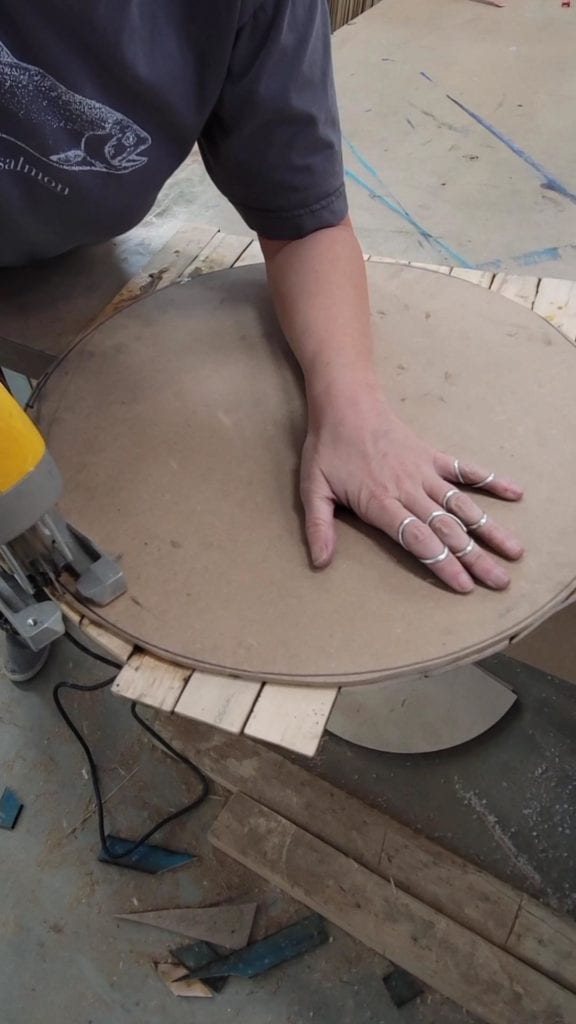
Start by deciding what size you want your tray. I made this one 18″ in diameter and it was a great size for my needs. I used a string and a tack to map the tray. Place the pin in the center of the MDF and use a tied string to create a circle.
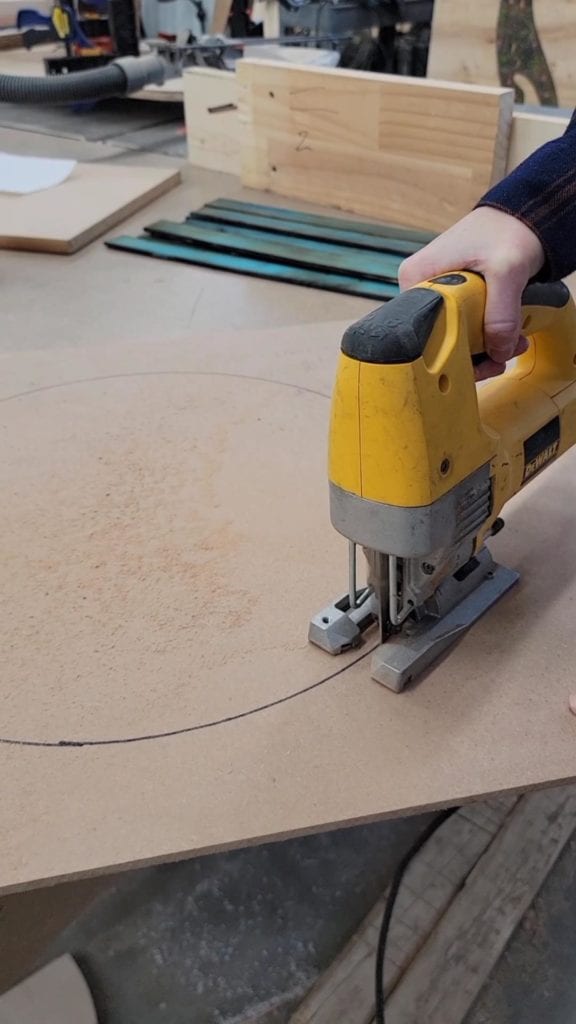
Using a stable surface use the jigsaw to cut the circle out. You don’t have to be perfect, close works. You can sand down any bumps or flaws very easily.
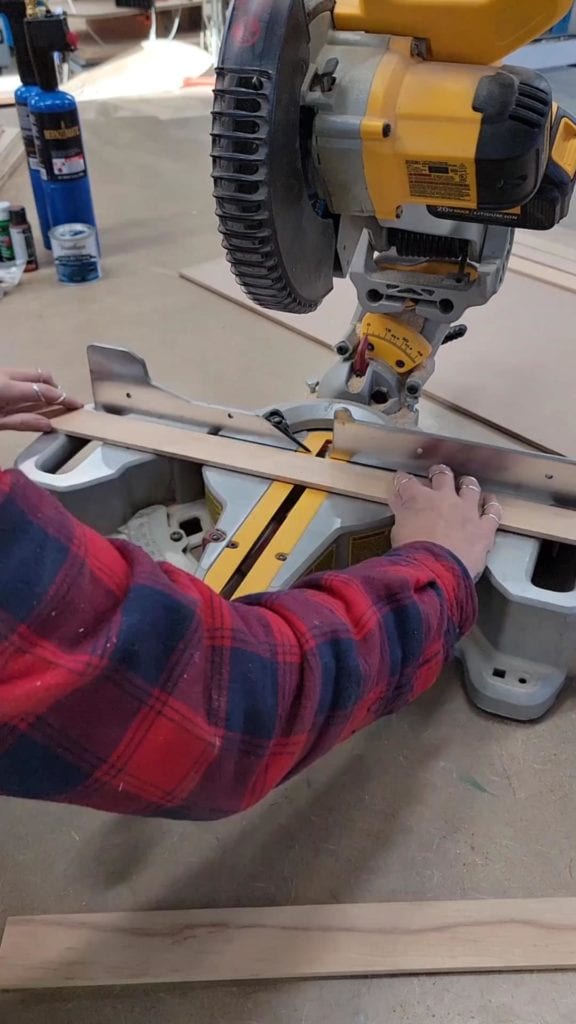
Set aside your circle and either use a small miter saw or your jigsaw to cut the trim strips. You want to make these slightly larger then your circle so we can trim them down after the glue up.
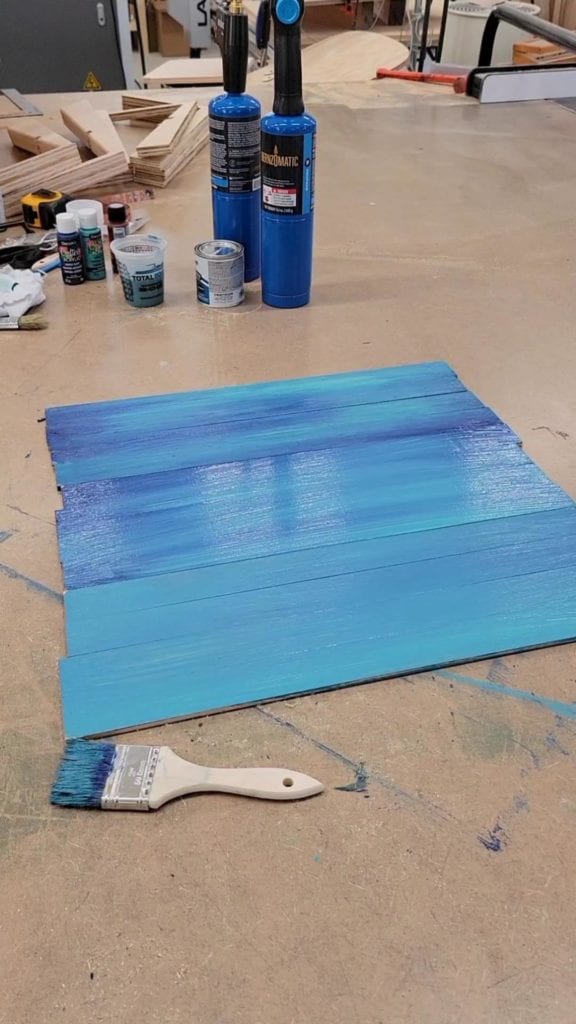
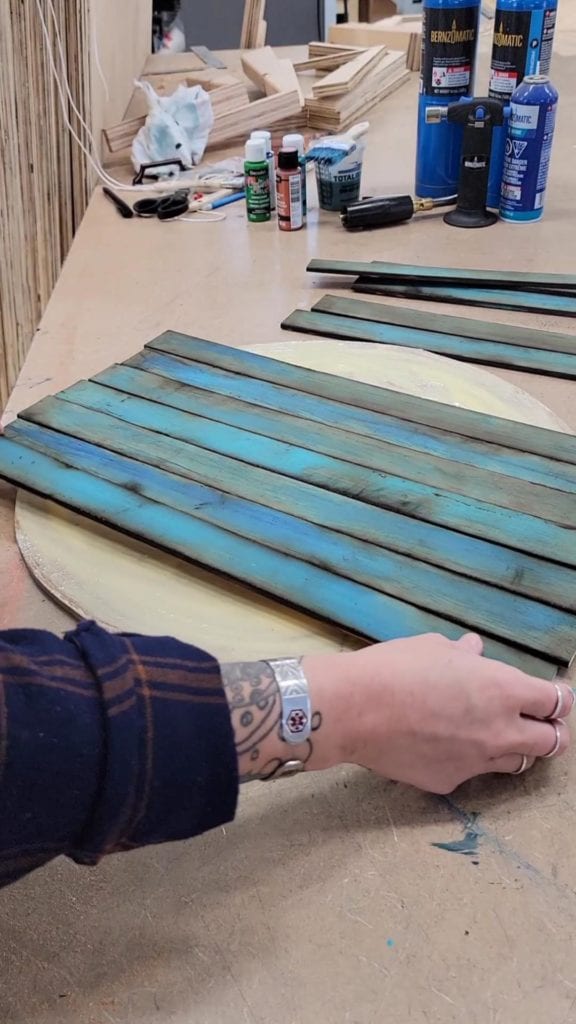
After cutting the strips make sure they fit on your circle. Once you are certain they will cover the whole tray it is time to paint. We are going to use the same chip brush on all boards with all colors. The point of this is to blend the colors and help them flow when we torch them.
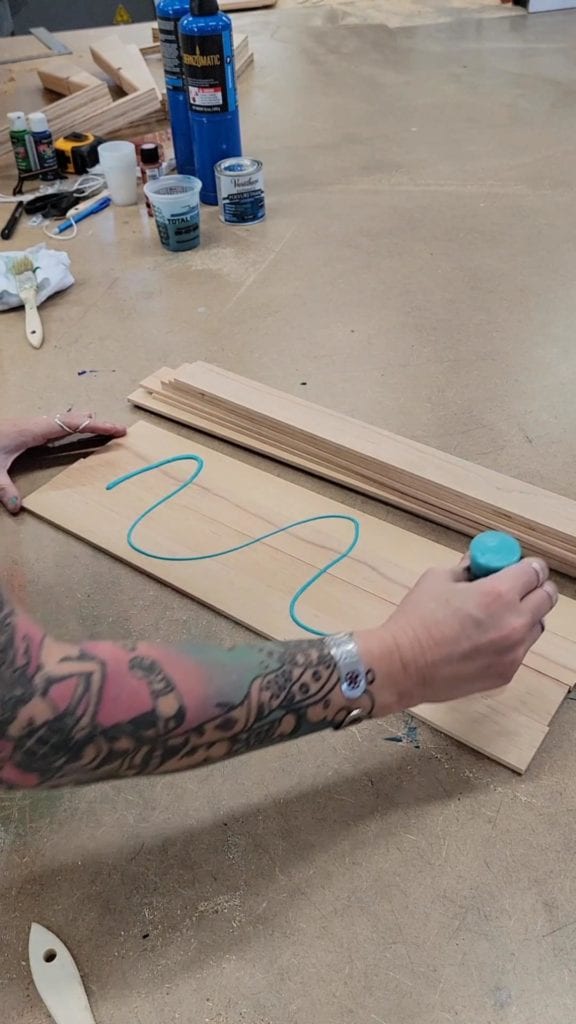
I simply brushed two shades of blue to get a gradient effect. There is no wrong way to do this; a lot of colors will appear when we apply the torch.
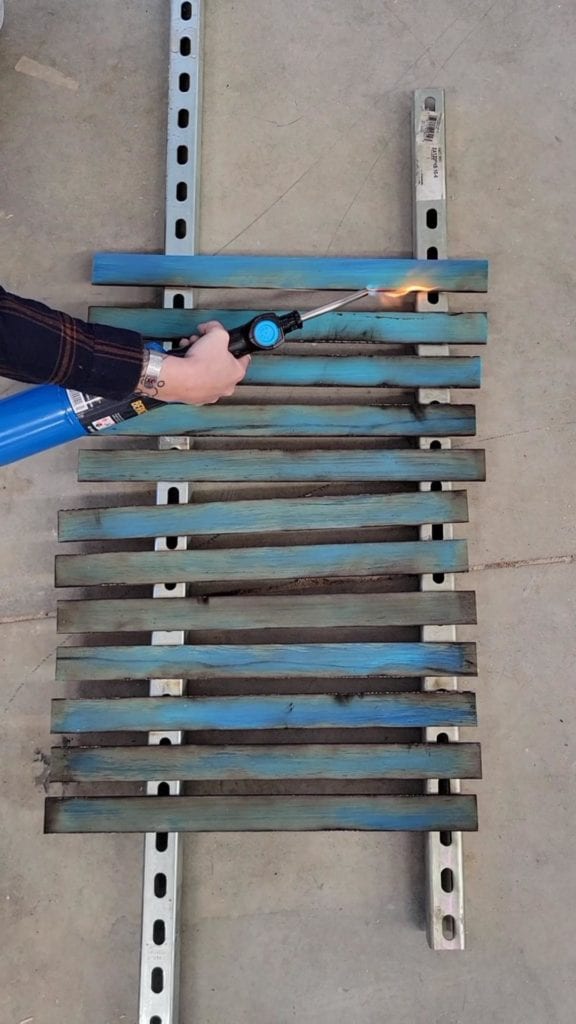
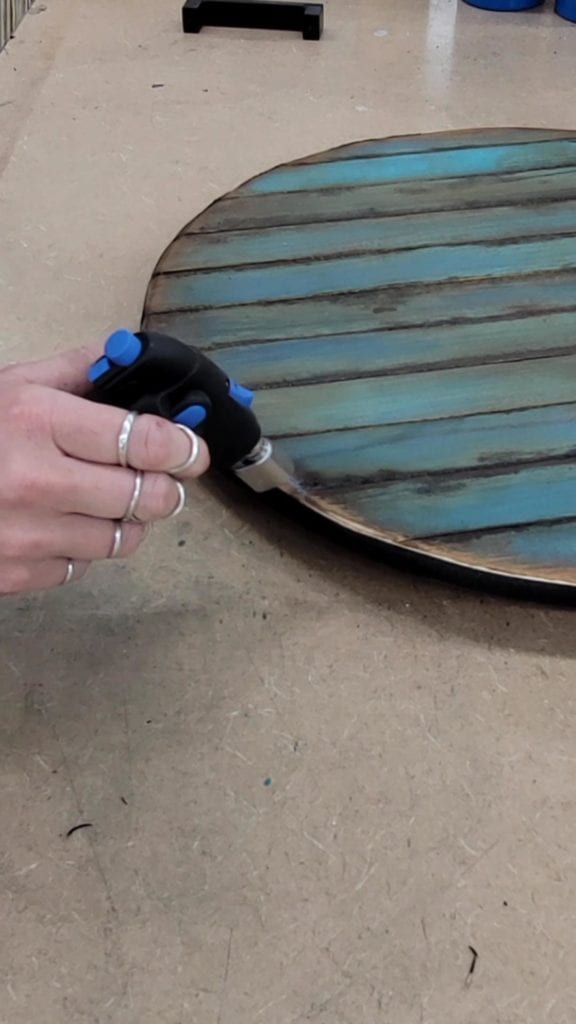
After your paint has dried move them to a surface area that is not flammable. I am using metal bars on a concrete surface. Also, make sure you are doing this step in a well ventilated area or using a VOC mask.

Using the Bernzomatic torch lightly start burning the wood. The point here isn’t to catch the wood on fire but to kiss the wood and bring out different tones. Move the torch back and forth slowly and pay attention to the edges. We want these to show a nice black look to them for added effect.
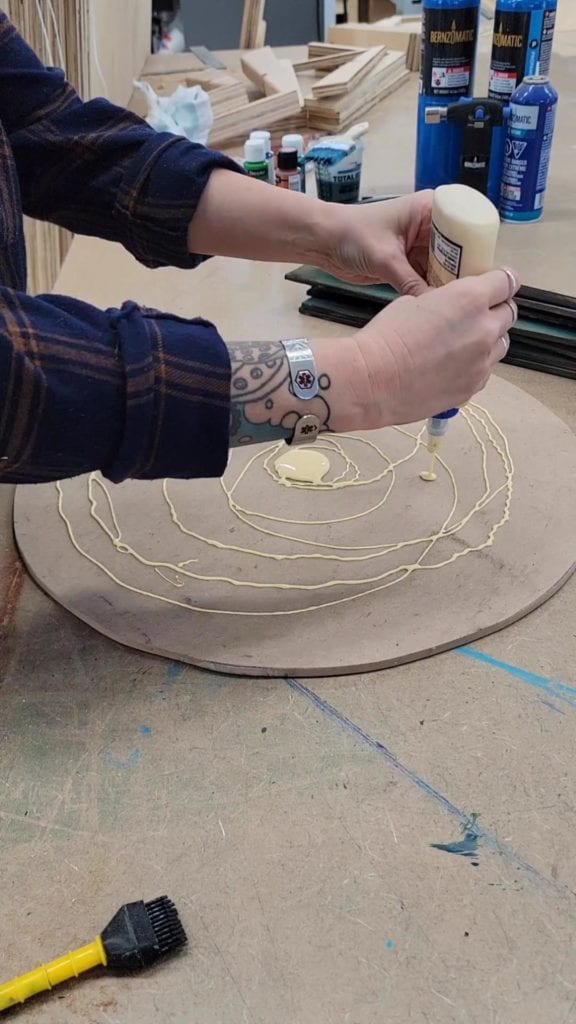
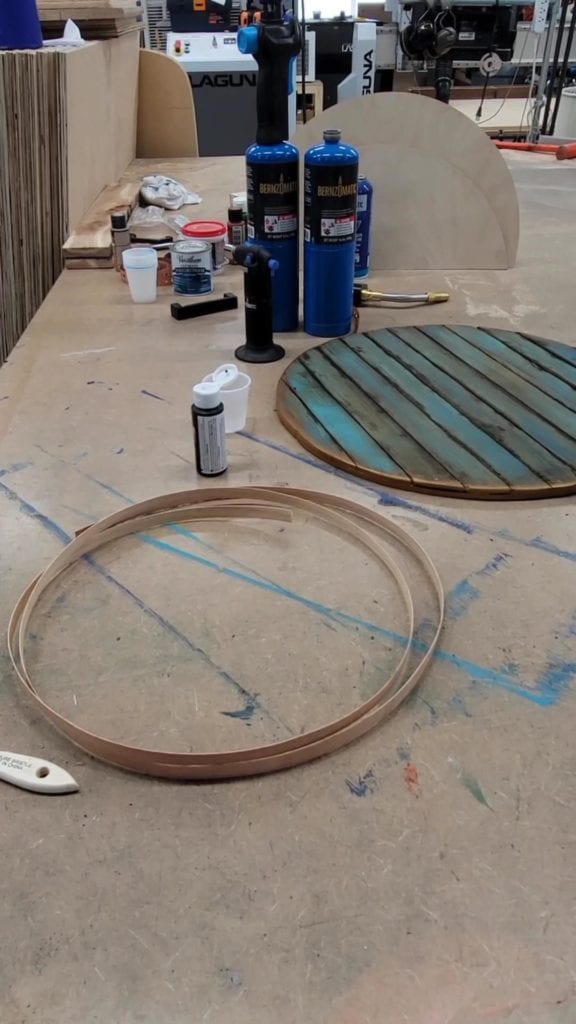
After the trim pieces have cooled it is time to glue them down to the circle we created a few steps ago.
Gather clamps or heavy objects to help press the trim strips down to the circle as they dry. After you have tested the layout grab your Titebond glue and with a heavy hand apply the glue to the circle.
Let sit for a minimum of 8 hours with heavy weight on top or clamps.
Flip over the tray and using the jigsaw trim the edges of the overhang. Use the MDF circle as your template and run the blade along the edges. Any stray wood bits can easily be sanded down to become flush with your circle.
Once you have your circle ready we are going to use the veneer banding to trim the edge out. I painted mine black but you could also stain this. Allow to dry before applying. I found that super glue worked best in this application. It allowed me to work quickly and turn the tray while working.
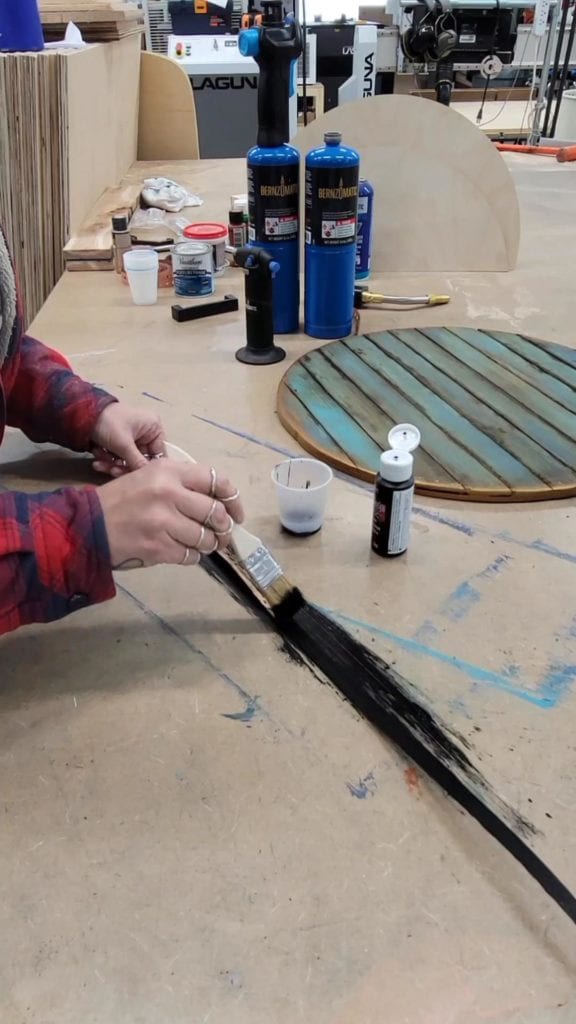
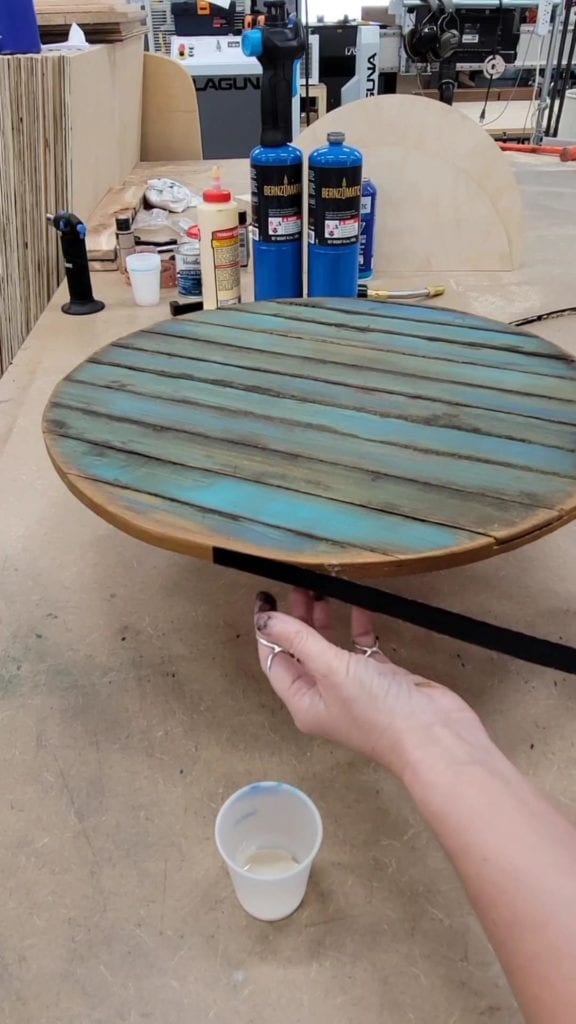
After allowing the glue to dry use the smaller Bernzomatic torch to touch up any wood that is showing.
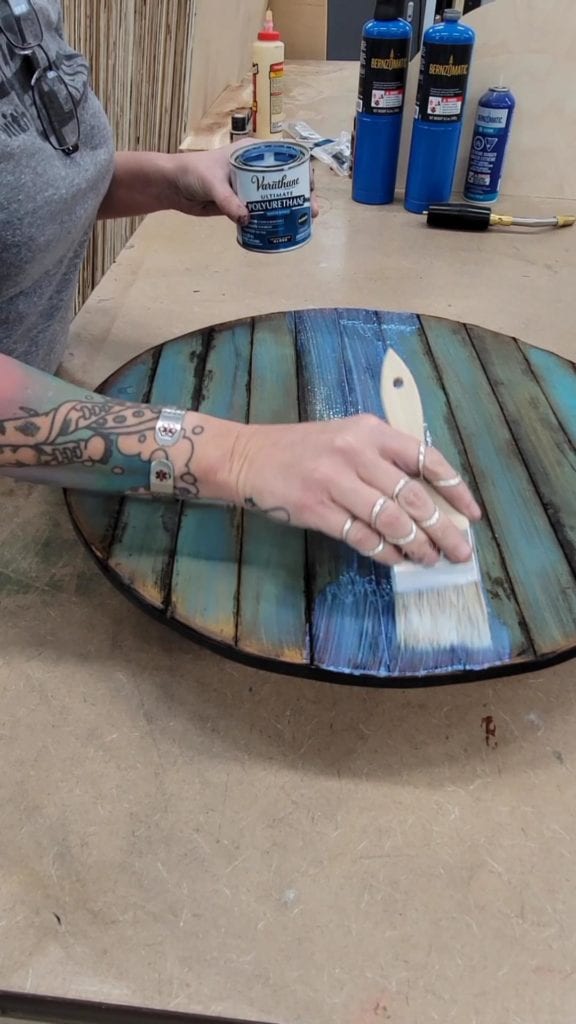
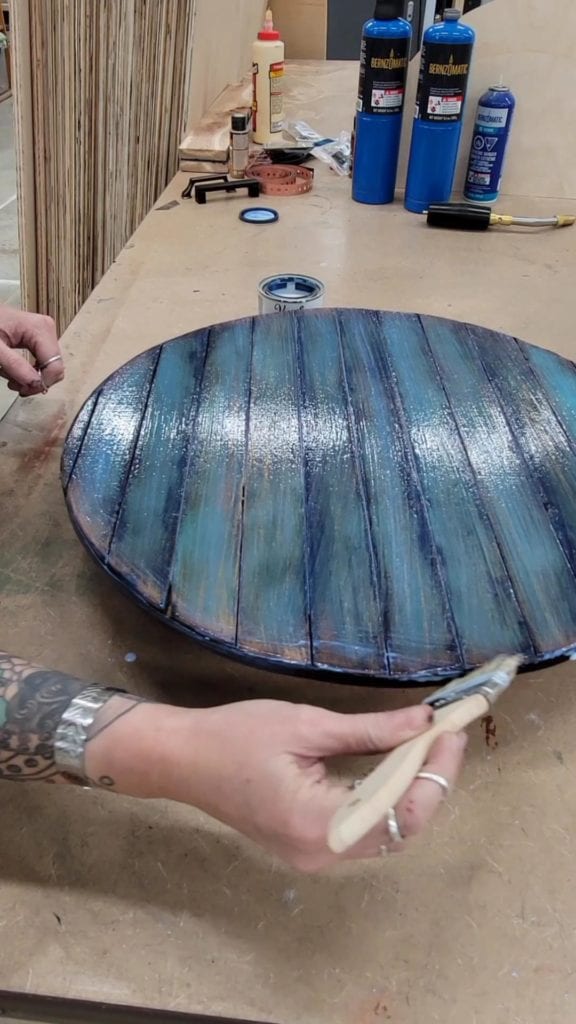
Using a chip brush elevate your project and apply 3 coats of Urethane (allowing to dry between each coat.) Also make sure you are getting the sides of the tray.
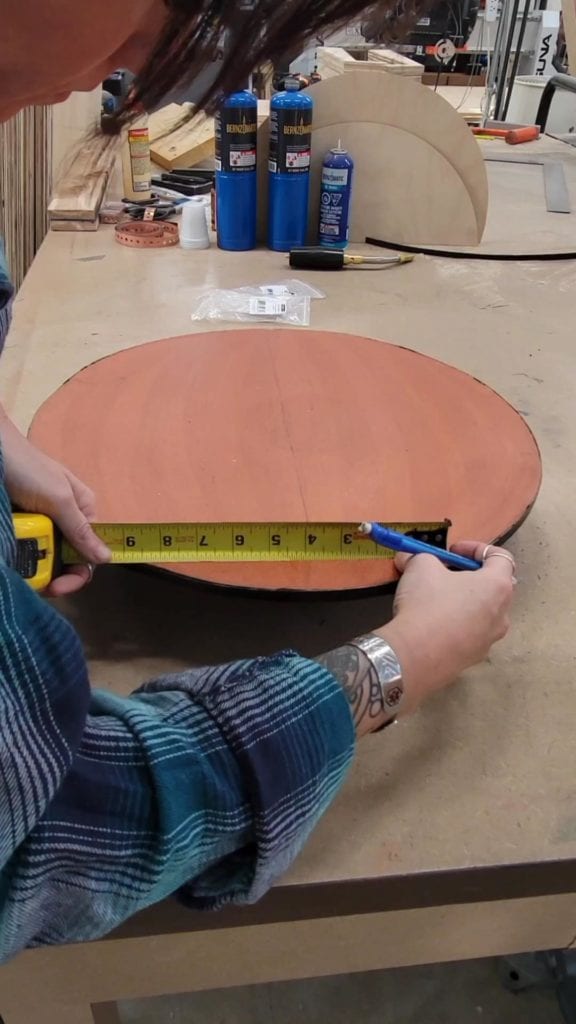
Flip your tray over and measure where you will place your hardware. Using the drill and an appropriate bit make pilot holes to push the screws through.

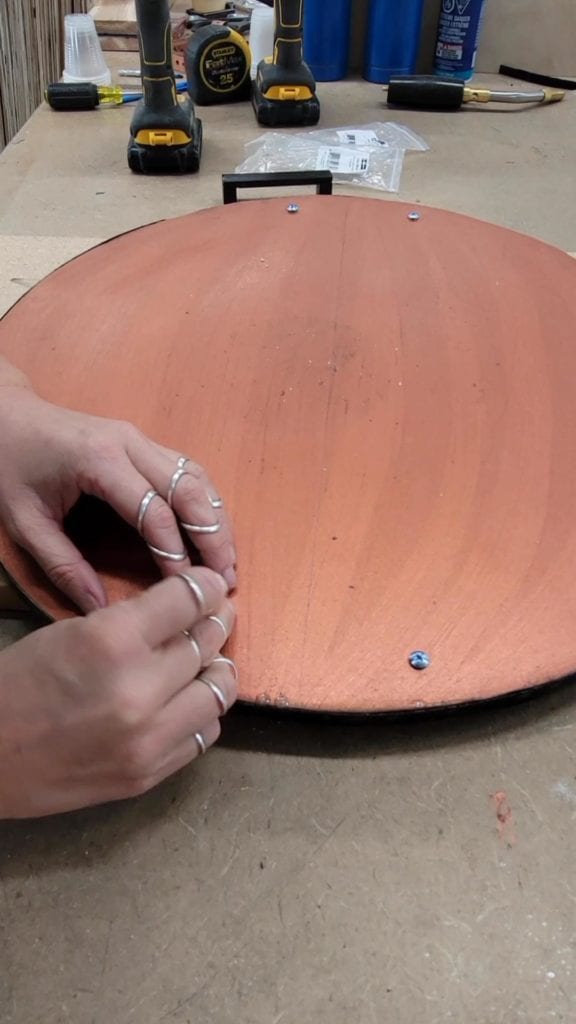
Attach the cabinet hardware and flip it over! You have now completed your first Bernzmatic serving tray!

Add a comment
0